So some of you may have heard that the aurora borealis, or northern lights, are predicted to be epic over the next few nights. The Weather Network says:
The best nights to watch, based on the forecasts from NOAA’s Space Weather Prediction Center, are Wednesday and Thursday. Space weather conditions are expected to reach at least G1 geomagnetic storm levels for both nights, with periods of G2 storm levels between sunset and midnight, EDT, and some potential for isolated G3 storm levels during those peaks. Adjust the timing according to your local time zone.
If all those terms don’t make sense to you, never fear! All you need to know is that the next few nights are going to be wild. If you have ever dreamed of staring up into a sky of dancing lights, now is a great opportunity. It’s always nice to catch the Lights before it gets too cold.
I’m going to give you a quick run down on the northern lights, i.e. what they are and how to photograph them.
Aurora Borealis: Science or Magic?
Honestly, the aurora is a little bit of both. In technical terms, the aurora is caused by electrically charged particles from the sun hitting the earths atmosphere. This is why ‘solar storms’ cause amazing displays of aurora, more particles are flying from the sun towards the earth. Different kinds of particles create different colours of light. The typical green colour is caused by particles colliding with low altitude oxygen particles; reds come from high altitude oxygen particles and purples come from nitrogen particles.*
The aurora has entranced many different people from many different cultures, for as long as humans have written down history. There are so many incredible myths and legends in which the aurora plays a part. I had always enjoyed these stories, but it was not until last May that I truly understood them.
Last May, I saw a phoenix. Seeing this shape in the sky over me, I can 100% understand where the old Norse/Inuit/Maori legends of gods and mythical creatures come from.

It was the night of May 7th (morning of May 8th) that I saw the best aurora that I have ever seen in my life.
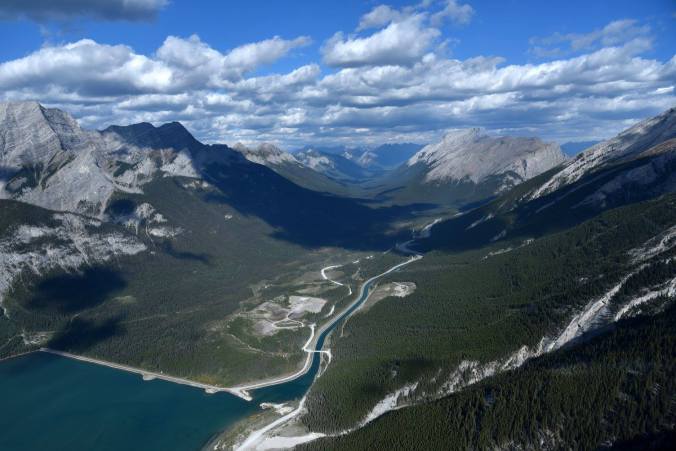
I could see the lights starting to dance at about 10pm, as I was getting home from visiting with friends in Banff, so I headed down to Barrier Lake to see if I could get some good shots. Within minutes of arriving at Barrier, the lights were no longer a hint on the horizon, the whole sky was dancing!
As I was getting ready to leave, I happened to notice that the lights seemed to be making shapes directly overhead, and lo and behold: a phoenix!
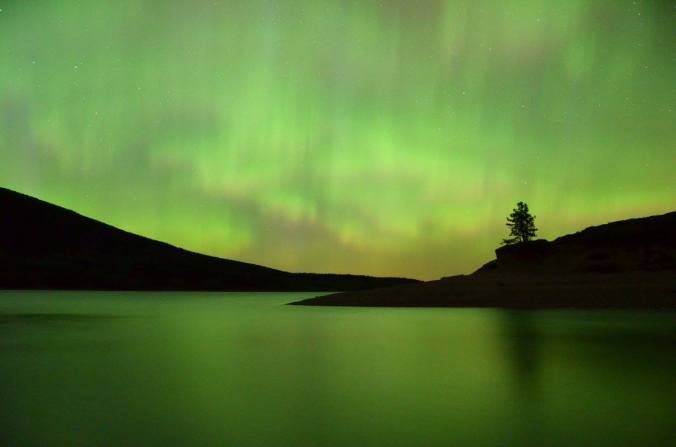
Full disclosure: the aurora does not always look like this. It is much more common, especially as far south as we are in the YYC/Kananaskis area, to see the aurora as an arc on the horizon.
Examples of arcs:
Overhead auroral formations are known as coronas:

So you want to photograph the aurora?
It’s not as hard as you may think but there are a couple things that you definitely need:
- Camera with manual settings
- Spare camera batteries (long exposures drain batteries. So does the cold)
- Wide angle lens. No zoom lens, although kit lenses will work.
- Tripod
- A clear view to the North/North-East
- Dark skies
- An Aurora forecasting app/website
- Lots of patience
Before going out, check the aurora forecast. A simple google search will bring up lots of options for aurora forecasts and all will give you the same basic data: forecasted levels of geomagnetic activity and what the aurora is doing right now.
The best time to catch the aurora is when the sun is on the opposite side of the planet. This is why it’s easier to catch the aurora in the winter, there are more hours of true darkness. It’s still possible to catch the aurora in the summer, there is just a much smaller window for viewing. It also helps if there is no moon. A full moon cast so much light, that it will interfere with your ability to see the lights.
So now that you are set up in a dark area with a clear view of the skies, what do you do with your camera? Cleary shooting on auto isn’t going to cut.
There are so many ways to set your camera to catch the lights, and no one way is right or wrong, however, there are some basics to keep in mind.
- Focus your camera to infinity. Some lens’ have an infinity symbol, but if yours doesn’t, zoom in on a distant light (like as far away as possible, I will use stars or planets) and manually adjust the focus of your lens until that distant point is clear. Remember to switch your camera to manual focus or as soon as you hit the shutter button, you will need to re-focus your camera.
- Use a tripod. It takes a long exposure to catch the northern lights, longer than you can stand still. A tripod will guarantee a crisp, in focus shot (if you followed the first step correctly 😉 ). It’s also a good idea to use a remote, or the self-timer function to fire off the shutter so as to eliminate hand shake from pressing the shutter.
- Turn your ISO up. ISO adjusts the light sensitivity of the sensor in your camera. The higher the ISO, the more light sensitive it is. Some cameras handle higher ISOs better than others. The higher the ISO, the grainier the photo will get. You need to find balance between aperture, shutter speed and ISO to get a well-lit photo that retains high quality.
- Shutter speed: If the aurora is bright, you can get away with a shorter shutter speed. Short in night photography terms being <10 seconds. If the aurora is faint, or not really dancing, I like to do a ~20-second exposure. If your exposure is too long, all the lights will blur together and you will lose the definition of the movement. If you do an exposure of longer than 30 seconds, you will actually start to see the stars move in the shot. More on star trails another time…
- Aperture: this is the f/ value on your camera. It adjusts how much light is let into the lens. The lower the number, the more you can adjust your plane of focus. The higher the number, the more of your shot will be in focus. At f/22, everything will be in good focus, where as at f/2.8 you will have a very shallow depth of field. When shooting the night sky, you obviously want as much of everything in focus as possible, so aim for a higher f/.
- Play with your settings! Remember, there is no right or wrong, there is just creative freedom 😉 Start out at something like f/11, ISO 1600 for 10 seconds and see what it looks like. If it’s too dark or too light, adjust. Keep playing until you get it right.
- Composition: I like to make sure I have some earthly aspect in my photos of the night sky: a mountain or a treeline gives perspective. Once you have it down pat, start throwing in new challenges, like posing people, etc.
I would love to hear your best aurora photography tips or favourite location for aurora viewing, leave them in the comments below!

 Once you’ve lived here (or anywhere that gets snow) long enough, you know if its snowed over night the second you open your eyes. The quality of light filtering in through your bedroom window changes and there is a hush over the world. Its a delightful, sleepy, feeling that leaves you wanting to cuddle into a fleecy blanket with a cup of coffee just a little while longer, before venturing out into the snowy world.